Monday, January 27, 2014

Update 29: Random Levels - Part 3

With the theory done and a solid prototype, it was time to implement the more advanced level creation into the main engine. I started by implementing the 6 tiles I needed, a vertical, horizontal, and the 4 turn pieces. I considered refactoring the pieces so that there were just two tiles and then rotate them to fit, but I realized it would be better to create the extra variation. Here is a screenshot all 12 tiles available now:


I moved my prototype code over to the main engine, replaced a few lines of code that were specific to the console app and generated my first dynamic level with a river.


With that working, I brought in the rest of the tiles (the previous screenshot was just river and a blank tile). The following two screenshots show two random maps with more of the pieces.


I can't begin to explain what a giant leap forward this is for me.

Sunday, January 26, 2014

Update 28: Random Levels - Part 2

Happy with my new random levels, I quickly discovered that some of my map combinations didn't make much sense, especially when rivers or roads were involved. In the sample below, you can see two river tiles are connected with a tile with no river - it just doesn't look right.


To make better maps, I needed to a river/road to start on one edge and finish on the opposite edge. I started a prototype to solve the problem, migrating over a few level data structures from my game - fortunately my design and structures were generic enough to allow this. My initial plan was to take my level area, draw a continuous river/road across the level, and then fill in the blank tiles with random tiles. To work through this, I created a simple console application to output ASCII, using these tiles as samples:

╔0══╗╔1|═╗╔2══╗╔3|═╗╔4|═╗╔5══╗╔6══╗
║   ║║ | ║─────║ └────┘ ║──┐ ║║ ┌──
╚═══╝╚═|═╝╚═══╝╚═══╝╚═══╝╚═|═╝╚═|═╝

With the templates in place, I started work on the tiles. The first level, running my current level creation algorithm, looked like this, again highlighting how ridiculous this all looks:


Next, I went to work drawing the river first, and then filling in the remaining tiles. This wasn't too difficult, starting with a simple (3x3 level): 


...and scaled nicely, getting more complex quickly (8x8 level):


Finally, I adjusted the path-finding of the river, so that it wouldn't drop back on itself. Essentially, if I start from the left, let my river go up, down and right, but never backwards (left). The output looks like this:


This is exactly the result I was looking for. Additionally, it scales up easily, I ran some 100x100 samples in less than a second.  The next phase is to recreate these tiles in my game, the next post will be about this process. If you'd like to play with the prototype, I've posted the level creation tool online here.

Saturday, January 11, 2014

Update 27: Random Levels - Part 1

After scaling up my levels and populating them with the new assets, I went to work creating randomized levels. The original xcom had 10x10 tiles that were randomly added to a level to create a 100x100 sized level. This worked very well to create a new experience in every level, even though the buildings were often recognizable.


I've only created four 10x10 tiles so far, but I've made them all prefabs. In the screenshots below, you can see two of the prefabs highlighted. Note that this is only a 20x20 level, with only 4 tiles of 10x10 each. 


Now when I load a level I am able to randomly choose, arrange and rotate these tiles to create a random level. This is a huge step forward for my project. By creating 10x10 prefabs with content in the center, I can really create some interesting levels. Here are a few more samples:


This last sample is a 30x30 sample (9 tiles total) from a five tile set (one of the tiles is blank):

Thursday, January 9, 2014

Update 26: Scale Issues

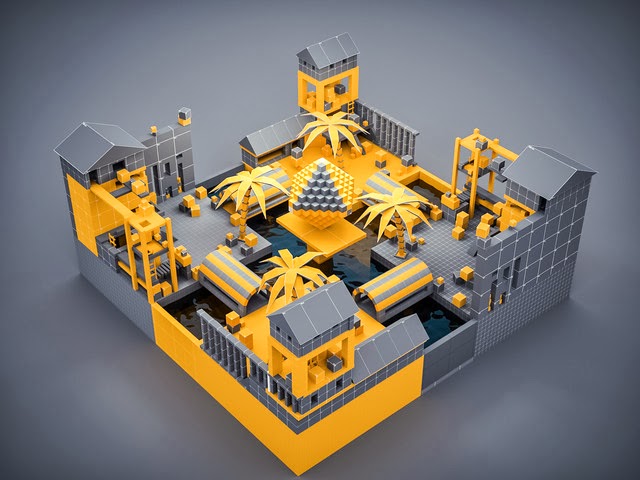
I recently bought a group of assets from the asset store to help make my prototypes look better. It's pretty exciting, even though these are only two colors (yellow and gray).


As with most implementations, you have to laugh when you see the first result. Here, I realized my scale was a little out. WAY out. Here is a screenshot of my level with some of the new assets, a bridge, palm tree and ladder. Fortunately, it looks like scaling everything by 10 is about right, as you can see my character looks to scale standing on the bridge.


If you'd like to see more about the assets I downloaded, you can watch this video:


Monday, January 6, 2014

Update 25: Loading, Saving Game Objects

I've spent most of the last month refactoring a lot of code, building in a basic campaign layer and then working on the connection between the campaign/strategy layer and the tactical layer. I'll talk more about the campaign later, as today I wanted to talk about XML serialization in more detail.

XML Serialization effectively means I’m saving and loading data to XML to persist game information on the hard disk.

When I start a mission, I populate my mission object with the details I need to start the mission. At the moment, it’s as simple as a level name, a list of player characters and a list of enemy characters. The class looks a bit like this:

using System.Collections;
using System.Collections.Generic;
using System.IO;
using System.Xml.Serialization;

public class Mission
{
    public string LevelName { get; set; }
    public List<Character> Players { get; set; }
    public List<Character> Enemies { get; set; }
}

Loading and saving the mission is straight forward with XML Serialization. Loading is basically opening the file with a StreamReader, De-Serializing the XML to the Mission object and returning the result. Saving is the inverse, creating a new file with the StreamWriter, Serializing the data to XML and then closing (saving) the save file.

public Mission LoadMission(string filePath)
{
    Mission gameToLoad = new Mission();
    StreamReader streamReader = new StreamReader(filePath);
    XmlSerializer reader = new XmlSerializer(typeof(Mission));
    return (Mission)reader.Deserialize(streamReader);   
}

public bool SaveMission(string filePath, Mission gameToSave)
{
    XmlSerializer writer = new XmlSerializer(typeof(Mission));
    StreamWriter file = new StreamWriter(filePath);
    writer.Serialize(file, gameToSave);
    file.Close();
    return true;
}

Let’s look a little closer at the Character class I'm using for players and enemies and how that saves. It has a name, photo, health, AP’s, a chance to hit  and a game object reference.

public class Character
{
    public string Name { get; set; }
    public string Photo { get; set; }
    public int Health { get; set; }
    public int ActionPointsRemaining { get; set; }
    public int ChanceToHit { get; set; }
    public CharacterObject GameObjectRef { get; set; }
}

Unfortunately, I can't directly serialize the GameObject type, (many binary types are not serializable), so I have to create a separate game object reference. They are big binary objects. At the end of the day, this isn't a big deal, I really only need to know what sort of game object the character is, the position/rotation/scale of the game object. Below is this CharacterObject class, with enough details of the game object to recreate it when I reload the level.

using UnityEngine;
using System;
using System.Collections;
using System.Xml.Serialization;

public class CharacterObject  {

    public string Name;
    public string PrefabName;
    public Vector3 Position;
    public Quaternion Rotation;
    public Vector3 Scale;
    [XmlIgnore]
    public GameObject GameObjectRef;

}

The result of all of this is the following XML, with one player and no enemies.

<?xml version="1.0" encoding="utf-8"?>
<Mission xmlns:xsi="http://www.w3.org/2001/XMLSchema-instance" xmlns:xsd="http://www.w3.org/2001/XMLSchema">
  <LevelName>IsometricCore</LevelName>
  <Players>
    <Character>
      <Name>Sam</Name>
      <Photo>Photos/Player</Photo>
      <Health>10</Health>
      <ActionPointsRemaining>1</ActionPointsRemaining>
      <ChanceToHit>85%</ChanceToHit>
      <CharacterObject>
          <Name>Player1</Name>
          <PrefabName>CharacterPrefab</PrefabName>
          <Position>
            <x>3.7499404</x>
            <y>0.5</y>
            <z>3.9403758</z>
          </Position>
          <Rotation>
            <x>0</x>
            <y>1</y>
            <z>0</z>
            <w>-1.62920685E-07</w>
            <eulerAngles>
              <x>0</x>
              <y>180.000031</y>
              <z>0</z>
            </eulerAngles>
          </Rotation>
          <Scale>
            <x>1</x>
            <y>1</y>
            <z>1</z>
          </Scale>
          <Tag>Player</Tag>
      </CharacterObject>
    </Character>
  </Players>
  <Enemies />
</Mission>


So what do we have to do to reload the GameObject again? We just need to call the load, and then for each Player (or Enemy), recreate the prefab object and put it back in the same location we saved.

// Initialize the mission object and load the mission xml file
Mission MissionData = new Mission();
MissionData.LoadMission(@"C:\mySaves\Mission1.xml");
if (MissionData != null)
{
   foreach (Character item in MissionData.Players)
   {
// Check to see if the player object already exists
GameObject newObject = GameObject.Find(item.CharacterObject.Name);
// If we can’t find the object, create it and attach it to the game object
if (newObject == null)
{
   Object prefab = UnityEditor.AssetDatabase.LoadAssetAtPath("Assets/Resources/" + item.CharacterObject.PrefabName + ".prefab", typeof(GameObject));
   newObject = GameObject.Instantiate(prefab, Vector3.zero, Quaternion.identity) as GameObject;
   // Transfer over the new properties
   newObject.transform.position = item.CharacterObject.Position;
   newObject.transform.rotation = item.CharacterObject.Rotation;
   newObject.transform.localScale = item.CharacterObject.Scale;
   newObject.name = item.CharacterObject.Name;
}
   }

}

So that is it! We have reloaded the game object!